Last update: 23 September 2019
In this part of the guide to My Summer Car, you will learn how to install the suspension and steering system in the Satsuma car. We will show you what parts you need and how to mount them. We will also tell you what size of keys you need to create a suspension and steering system in My Summer Car.
- Front suspension
- Rear suspension
- Steering system
You start putting the car together by placing it on wheels.
Front suspension
All the necessary parts for the suspension can be found on the garage’s floor, on the left. If you want, you can use the CAR JACK to lift the front and then the back of the car. However, this is not necessary — proper placement of the part will raise the car. But the Car Jack adds to the atmosphere! The order doesn’t matter, but we are starting with the front elements.
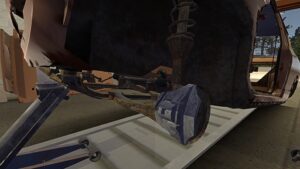
We start by taking the SUB FRAME part (size 10 wrench), called a stroller or a sled, on which the key elements in the front of the car will lean. Grab them like in the picture and attach them to the underbody below the future engine — keep doing it until the OK sign appears.
Let’s start with the SUB FRAME under the front part of the car.
Simply place the part and click the mouse button, and the game itself will install the part in the right place.
The sled is attached with four bolts and a size 10 wrench. Screws are around the corners of the parts. The right side is a mirror image of the left side. Watch out for the rear screws because they aren’t visible from above. You will find them under the upholstery in the cabin — press Q to grab and C to crouch to find them.
The front screws are clearly visible.
The rear ones aren’t. Screws are unscrewed from the bottom under the upholstery near the pedals.
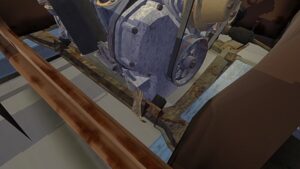
Time for WISHBONE (size 10 wrench), that is two swingarms. Be careful because they are assigned to the left (FL) and the right (FR) side. Attach them as shown in the picture and tighten with two size 10 bolts.
Use size 10 wrench to tighten the two symmetrically located screws.
SPINDLES are next (size 12 wrench). Watch out, because they are for the right (FR) and left (FL) side. Get them close to WISHBONES to install them and tighten with size 12 wrench.
First, we install the SPINDLES.
They are attached with a size 12 bolt.
Time for the STRUT — they are also unique to the right (FR) and left (FL) side.
Apply it vertically above the WISHBONE.
Attach it to the chassis with three size 10 bolts.
Next, attach four size 9 bolts to the SPINDLE.
Now install the disc brakes (DISC BRAKE) but don’t screw them yet.
If you want to attach the wheels, you first need to place HALF SHAFTS in steering knuckles. It doesn’t matter which is left, which is right — keep only the correct layout, the flat end inside.
HALF SHAFT
Proper installation. Do it from both sides.
Tighten the HALF SHAFT which is currently hidden behind the brake with a size 14 wrench.
Now place the front wheels and tighten them up with four size 13 bolts.
?
Wheels require a size 13 wrench.
Rear suspension
Since the front wheels are raised, align the level by installing the Car Jack from the back — the installation will be more convenient.
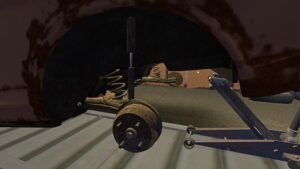
Prepare two TRAIL ARM for the back. Again, pay attention to the symbols — RR for the right, and RL for the left. Install them in the front of the rear compartment for the wheels with two symmetrically arranged size 12 bolts.
Tighten the part with two size 12 screws.
Now, you need to insert tow COIL SPRINGS without any screws. Place them vertically over the black tip of the TRAIL ARM.
Now, connect all with a SHOCK ABSORBER. The installation is identical on the left and right sides. Install them vertically on the TRAIL ARM.
The SHOCK ABSORBER is attached to the body from the trunk with a size 12 wrench.
And to the TRAIL ARM with two size 6 bolts.
Time for DRUM BRAKE. It doesn’t matter which side you attach it to. Attach them to the TRAIL ARM and then tighten with one size 14 bolt.
The last thing you need to do is to attach the wheels.
Steering system
The front suspension is partially connected to the steering system. Go back to the front of the car and install STEERING RACK in the sled. You attach it to the sled with four size 9 bolts.
Size 9 wrench will allow you to install the steering rack in the sled.
Next, attach STEERING RODS on the left and right. Both are the same so it doesn’t matter where you install them. The rods fit horizontally between the center rod and the suspension column. You screw them with a size 12 bolt to the column of the suspension in a fairly hidden place. Keep moving the wrench around until you see the green color (move the mouse wheel up).
It doesn’t matter to which side you install which rod.
Their mounting place is a bit difficult to see, but both are arranged in this way:
Size 12 wrench screws one bolt of the side rods.
After installing the rods and half shafts, the engine compartment should look like this:
Time for the main part — STEERING COLUMN.
Install it from inside the cabin in the obvious place.
Then, screw to the middle rod with two size 8 screws. The steering wheel doesn’t need to be installed yet. You don’t need it now anyway.
In this guide, you will find the process of building a Satsuma car in My Summer Car along with the bolt sizes. The guide is complete and constantly updated. Prefer a video tutorial? You will find it in this guide.
First steps and necessary items
- Before you start building a car, check the guide on Start the game – do what is described there first.
- The nuts on the lining/linkage parts must be tightened/unscrewed using flat wrenches (spanner set)
- Before building a car, take the battery and connect it for charging
- The video tutorial can be found at the bottom of the guide
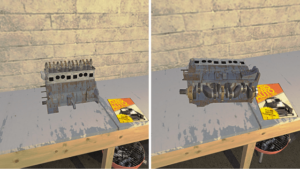
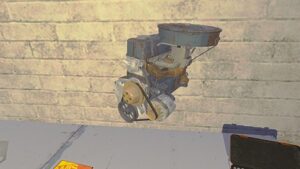
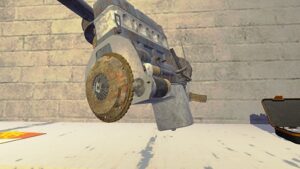
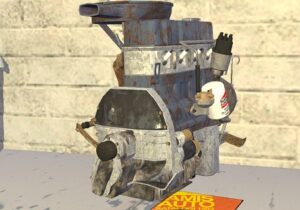
Engine
- Crankshaft -> block
- Main bearings (x3) – 2x9mm
- Pistons (x4) – 2x7mm
- Head gasket -> block
- Cylinder head – 10x7mm
- Adjust valves – screwdriver (you can do it after building the car and starting the engine)
- Rocker shaft – 5x8mm – to properly adjust the rocker shaft, scroll down to the end (20 times) then scroll up 7 times (repeat on each valve). Badly adjusted valves make a ticking sound
- Rocker cover – 6x7mm
- Camshaft – 2x5mm (hole on left side of engine)
- Camshaft gear – 1x10mm – The camshaft gear must be correctly positioned if it goes wrong your engine will be seriously damaged. If after starting the engine you hear a metallic knock, it will mean that you have set the gear position incorrectly.
- Timing chain
- Timing cover – 6x6mm
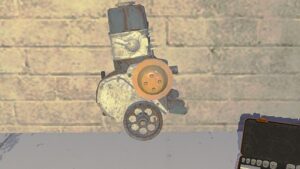
- Water pump – 5x7mm
- Water pump pulley – 4x7mm
- Crankshaft pulley – 1x11mm
- Headers – 5x8mm
- Carburator – 4x8mm
Airfilter – 2x6mm - Alternator – 1x7mm, 1x10mm, screwdriver – tighten the screws first, then loosen the alternator by hand, put on the Alternator belt and pull it back (to the end, then two turns of the mouse wheel down). If the alternator belt squeals after starting the engine, it is too loose.
- Engine plate
- Starter – 2x7mm
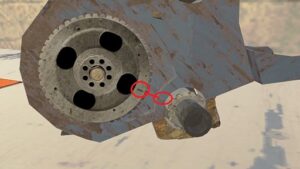
- Flywheel – 6x7mm
- Clutch pressure plate -> clutch cover plate
- Clutch disc -> cover plate
- All Clutch components for Flywheel – 6x6mm
- Oilpan – 8x7mm, 1x13mm
- Gearbox and then Inspection cover – 6x7mm, 1x10mm
- Drive gear – 7x6mm
- Distributor – Screwdriver – to properly adjust the distributor, scroll down to the end and then scroll up 27 times before tightening the screw
- Spark plugs (x4) – you need to tighten with a sparkplug wrench/socket
- Fuel pump – 2x7mm
- Oil filter – Mouse scroll
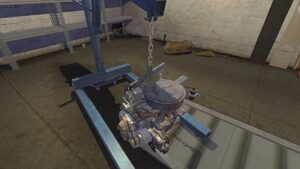
To attach the engine to Satsuma, use Motor Hoist (hook the chains onto the engine and tighten the screws 2x10mm).
Suspension, chassis, body, interior
- Sub frame – 4x10mm
- Steering rack – 4x9mm
- Steering column – 2x8mm
- Wishbones (x2) – 2x10mm
- Spindles (x2) – 1x12mm
- Struts (x2) – 4x9mm, 3x10mm
- Steering rods (x2) – 1x12mm
Now you need to move the engine to the front of the car (you need to aim well so that the screws appear) and tighten – 3x11mm
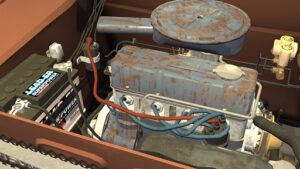
If you screwed the engine to the subframe, take Electrics and screw it to the vehicle body – 2x8mm
*Don’t worry now about the wiring and battery shown in the picture – the screenshot was taken after the car was completely built
- Disc brakes (x2) and then Halfshafts (x2) – 3x9mm, 1x14mm
- Now you need to adjust the steering rod (x2) so that the car goes straight – 1x14mm
Turn until it stops turning (wheel, steering rod), then turn exactly 60 times in the opposite direction

- Trail arms (x2) – 2x12mm
- Drum brakes (x2) – 1x14mm
- Coil springs (x2)
- Shock absorbers (x2) – 1x12mm, 2x6mm
- Wheels (x4) – 4x13mm
- Fuel strainer – 1x8mm
- Dashboard – 2x10mm (one bolt in glove box)
- Dashboard meters – 2x6mm (glove box)
- Clock gauge – 2x7mm
- Radio
- Steering wheel – 1x10mm
- Gear stick – 3x6mm
- Gear linkage – 3x5mm
- Clutch master cylinder – 1x9mm, 2x8mm
- Brake master cylinder – 1x9mm, 2x8mm
- Clutch lining – 2x7mm
- Brake lining – 11x7mm (6xline nuts,1xbolt in the engine, 4xwheel – at each wheel)
- Handbrake – 4x8mm, 1x5mm
- Radiator – 4x7mm
- Radiator hoses (x3) (You need to screw clamps (5 in total) – use a Screwdriver)
- Fuel tank pipe
- Fuel tank – 7x11mm, 1x12mm (fuel lining)
- Exhaust pipe – 3x7mm
- Exhaust muffler – 1x7mm
- Front seat (x2) – 4x9mm
- Rear seat – 2x9mm
- Car Light Bulb to Headlight
- Headlights (x2) – 2x7mm
- Rear lights (x2)
- Bootlid – 4x6mm
- Hood – 4x6mm
- Back panel or subwoofer panel
- Doors (x2) – 4x10mm
- Fender (x2) – 5x5mm
- Grille – 2x6mm
- Bumpers (x2) – 2x8mm
- Hubcap (x4)
- Mudflap (x4)
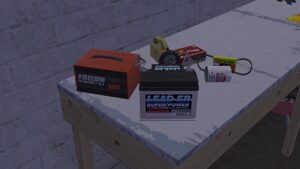
- Battery
Now refill the car fluids (brake/clutch oil, engine oil, coolant)
Wiring
Before connecting anything with a wiring mess, remember to disconnect the battery from the power supply – otherwise you may die. You can’t connect the wires badly, so even if you walk and spam the F key, you don’t have to worry about doing something wrong.
The hardest part of building a car, i.e. an electrician, is ahead of you. Sometimes you will have to connect the cables to the same place several times. There are several places in the car where the wiring harness connectors are located – it is from them that you need to connect the electrics of individual elements:
List to connect:
– To the battery (negative and positive terminal):
- Starter – you must unscrew the bolt (1x7mm) before connecting. In second place, after connecting the wires you need to tighten it (1x5mm)
– Regulator:
- Alternator
– Headlights harness connector:
- Headlight right and left (take off the headlights 2x7mm – first remove the Grille – 2x6mm)
- Marker light (you won’t have them at the beginning of the game)
Main harness connector
– Main harness connector:
- Battery
- Electrics
- Radiator
- Regulator
– Rear harness connector:
- Fuel tank
- Rearlight left and right
– Fusebox
- Dashboard (gauges, ignition, hazard, lights)
– Radio harness connector:
- Radio
- Amplifier (you won’t have them at the beginning of the game)
– Dash harness connector:
- Dashboard (wipers, headlights, extra gauge, fuel mixture gauge)
– Amplifier:
- Radio
- Subwoofer left and right
Finally, you need to connect the battery (two clamps, start with the plus (red)) – the first start of the car may take up to 30 seconds, this is normal if the fuel pump is in poor condition.
Video tutorial
My Summer Car изначально предназначена для тех, кто хочет пройти через эффектный симулятор автомеханика. Но помимо этого, игрокам также нужно собрать гоночный автомобиль. Среди всех аспектов автомеханики в игре, сборка подвески является одним из наиболее затруднительных моментов.
Однако, если вы знаете, как правильно собрать подвеску, то получите не только возможность кататься на гоночной трассе, но и улучшать ходовые качества вашего автомобиля, делая езду более комфортной и безопасной. В этой статься мы расскажем вам о шагах, необходимых для того, чтобы правильно собрать подвеску в My Summer Car.
Предупреждение: порядок деталей, указанный ниже, соответствует последней версии игры на момент написания статьи. Если игра изменится или будет обновлена, порядок каких-то деталей на картинках может отличаться, но общая концепция сборки останется прежней.
Содержание
- Как собрать подвеску в My Summer Car
- Шаг 1: Соберите все необходимые детали
- Шаг 2: Установите пружины и амортизаторы
- Шаг 3: Установите тормозные колодки и диски
- Шаг 4: Выровняйте подвеску
- Шаг 5: Проверьте работу подвески
- Шаг 1: Подготовка
- 1.1. Закупка необходимых материалов и комплектующих
- 1.2. Проверка работы инструментов
- 1.3. Подготовка автомобиля
- Шаг 2: Замена пружин
- Шаг 2.1: Открутите болт верхнего крепления пружины
- Шаг 2.2: Выньте старую пружину и установите новую
- Шаг 2.3: Закрепите новую пружину болтом верхнего крепления
- Шаг 3: Установка новых амортизаторов
- Шаг 3.1: Снятие старых амортизаторов
- Шаг 3.2: Установка новых амортизаторов
- Вопрос-ответ
- Какие инструменты нужны для сборки подвески в My Summer Car?
- Как правильно установить стойки на подвеску?
- Как правильно установить амортизаторы на подвеску?
- Как снять и установить рулевую рейку в автомобиле?
- Как проверить правильную установку подвески после ее сборки?
Как собрать подвеску в My Summer Car
Шаг 1: Соберите все необходимые детали
Перед тем, как начать сборку подвески, вам потребуется правильно подобрать и собрать все необходимые детали, включая пружины, амортизаторы, тормозные колодки и т.д. Список всех необходимых деталей можно найти в руководстве пользователя игры.
Шаг 2: Установите пружины и амортизаторы
Установите пружины и амортизаторы на соответствующие места на подвеске. Убедитесь, что все детали установлены правильно и крепко закреплены. Важно также убедиться, что детали совместимы между собой.
Шаг 3: Установите тормозные колодки и диски
Установите тормозные колодки и диски на соответствующие места на подвеске. Убедитесь, что они установлены правильно и крепко закреплены. Важно обратить внимание на правильную установку блокировки колес.
Шаг 4: Выровняйте подвеску
После установки всех деталей необходимо выровнять подвеску, чтобы она была на одном уровне и не кривилась. Для этого можно использовать специальный инструмент и провести необходимый калибровочный процесс.
Шаг 5: Проверьте работу подвески
После завершения сборки необходимо проверить работу подвески. Для этого можно провести тестовую поездку на автомобиле и убедиться, что все работает правильно и без проблем.
Шаг 1: Подготовка
1.1. Закупка необходимых материалов и комплектующих
Перед тем как начать собирать подвеску, важно убедиться, что у вас есть все необходимые материалы и комплектующие. Как правило, для сборки подвески вам потребуются: амортизаторы, пружины, шаровые опоры, тяги рулевой рейки и тормозные колодки. Приобретайте все комплектующие только у проверенных поставщиков, чтобы избежать нежелательных сюрпризов в процессе сборки.
1.2. Проверка работы инструментов
На этом этапе важно убедиться, что все нужные для сборки инструменты работают исправно и не требуют замены или ремонта. Проверьте наличие перочинного ножа, отверток разной формы и размера, трубного и торцевого ключей, гаечных ключей, а также специальных инструментов, которые могут понадобиться в процессе работы.
1.3. Подготовка автомобиля
Перед началом сборки подвески нужно убедиться, что автомобиль находится в исправном техническом состоянии. Проверьте состояние шин, дисков, подшипников, пневмоподвески, тормозной системы и других узлов, которые могут оказать влияние на работоспособность подвески. В случае нахождения неисправностей, их нужно исправить до начала сборки подвески.
Шаг 2: Замена пружин
Шаг 2.1: Открутите болт верхнего крепления пружины
Для того чтобы заменить пружины, сначала нужно открутить болт верхнего крепления пружины, который находится в верхней части амортизатора. Для этого используйте ключ.
Важно: Для того чтобы открутить болт, сначала нужно снять вес с подвески.
Шаг 2.2: Выньте старую пружину и установите новую
Выньте старую пружину, после чего установите новую пружину на место.
Совет: Не забудьте проверить, что новая пружина имеет ту же жесткость, что и старая.
Шаг 2.3: Закрепите новую пружину болтом верхнего крепления
Закрепите новую пружину болтом верхнего крепления, затянув его при помощи ключа. Убедитесь, что болт затянут достаточно крепко.
Совет: Если вы заменяете обе пружины, повторите шаги 2.1-2.3 для второй пружины.
Шаг 3: Установка новых амортизаторов
Шаг 3.1: Снятие старых амортизаторов
Перед установкой новых амортизаторов необходимо снять старые. Для этого необходимо открутить верхнюю гайку на амортизаторе при помощи ключа размером 17 мм. Затем необходимо открутить нижнюю гайку амортизатора, которая находится под крышкой передней балки, также при помощи ключа размером 17 мм.
При снятии старых амортизаторов обратите внимание на их состояние: если они сильно изношены, оставляют следы на пыльнике и работают не очень хорошо, то их следует заменить.
Шаг 3.2: Установка новых амортизаторов
После того, как старые амортизаторы будут сняты, можно установить новые амортизаторы. Новые амортизаторы должны быть куплены заранее и иметь точные размеры, чтобы они подошли под конкретную модель автомобиля. Новые амортизаторы должны быть установлены по той же схеме, что и старые: сначала нижняя гайка, затем верхняя гайка, оба закручиваются при помощи ключа размером 17 мм.
После установки новых амортизаторов рекомендуется проверить их работоспособность, установив автомобиль на ровную поверхность и проверив уровень упругости в подвеске.
Вопрос-ответ
Какие инструменты нужны для сборки подвески в My Summer Car?
Для сборки подвески в My Summer Car необходимы ключи разного размера, молоток, отвертка, шестигранник, пассатижи и съемный ключ рулевой рейки.
Как правильно установить стойки на подвеску?
После того, как стойки подвески почищены, проверьте пружины и замените их при необходимости. Затем установите стойки на место, затянув болты на максимальную крутость. После этого, отрегулируйте высоту стойки при помощи гаечного ключа.
Как правильно установить амортизаторы на подвеску?
Установите амортизаторы на место, затянув болты на максимальную крутость. После этого, отрегулируйте стойку при помощи гаечного ключа. Обратите внимание на стойки: они должны быть перпендикулярны земле.
Как снять и установить рулевую рейку в автомобиле?
Для того, чтобы снять рулевую рейку, отсоедините шаровые опоры. Далее выведите рулевой наконечник из рейки и затем отвинтите саму рулевую рейку. Чтобы установить рулевую рейку, выполните эти действия в обратном порядке: установите рулевую рейку на место и затяните болты, установите на концы рейки шаровые опоры.
Как проверить правильную установку подвески после ее сборки?
После сборки подвески, она должна быть протестирована на прочность. Для этого произведите несколько сильных торможений и ускорений, а также проведите контрольное тестирование на участке с плохой дорожной поверхностью. Если подвеска установлена правильно, то машина будет ехать ровно и прекрасно держаться на дороге, а шум и вибрации будут минимальны.